Growing chili at home has several advantages:
- Delicious and Fresh: Homegrown chilies are more flavorful than store-bought varieties.
- Beginner-Friendly: Chilies are forgiving and thrive with basic care.
- High Yield Potential: With proper sunlight, soil, and fertilization, a single plant can produce dozens of fruits.
- Suitable for Small Spaces: Chilies can flourish in pots, containers, and small garden patches. (gardenerguidebook.com)
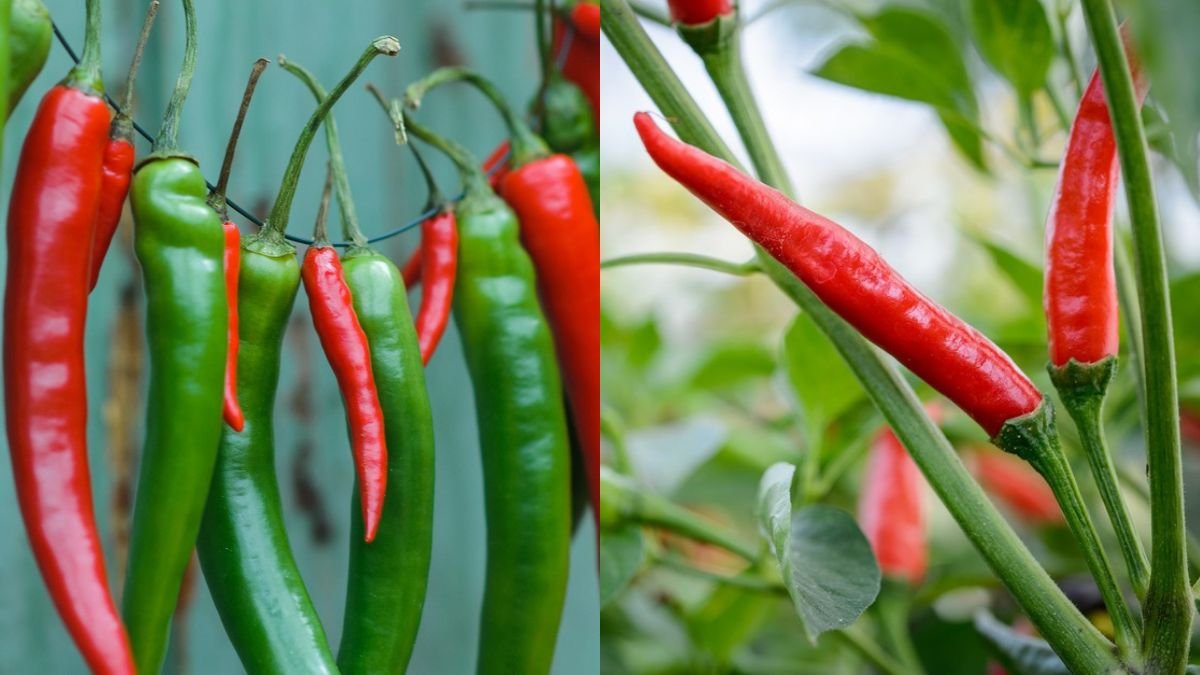
Chilies are also visually appealing. With bright green foliage and vibrant red, yellow, or orange fruits, they enhance your garden’s aesthetic while producing a bounty of spicy, edible fruit. (homesandgardens.com)
Choosing the Right Chili Varieties
Selecting the right chili variety is crucial for home success. Beginners should consider:
- Mild Varieties: Like Hungarian wax or cayenne, which are easier to manage and versatile for cooking.
- Ornamental Chilies: Such as Numex Twilight or Thai ornamental types, which are colorful and decorative.
- Hot Varieties: Habanero or bird’s eye chilies for experienced cooks who enjoy extra spice.
Choose varieties suited to your climate, container size, and taste preference. (myorganicgarden.in)

Supplies You’ll Need
Before planting, gather the following essentials:
- Seeds or Seedlings: Healthy, disease-free plants.
- Containers or Grow Bags: Minimum 8–12 inches deep with drainage holes.
- Potting Mix: Well-draining soil enriched with compost.
- Fertilizer: Balanced organic fertilizer or compost tea.
- Sunlight: A spot that receives 6–8 hours of direct sunlight daily.
With these basic supplies, you can start growing high-yield chili plants even in limited spaces. (aajtak.in)
Step-by-Step Guide to Growing Chili at Home
1. Seed Selection and Sowing
Choose seeds based on your preferred flavor and heat level. Plant them ¼–½ inch deep in moist soil. Keep the soil consistently moist but not waterlogged. Most seeds germinate within 7–14 days. (chili-shop24.com)
2. Preparing the Soil and Containers
Use high-quality, well-draining soil mixed with organic compost. Fill pots or grow bags, leaving a few centimeters at the top for watering. Chilies prefer slightly acidic to neutral soil (pH 6–7). (aajtak.in)

3. Sunlight and Temperature
Place your chili plants where they receive 6–8 hours of direct sunlight per day. Warm temperatures (20–30°C) are ideal for germination, growth, and flowering. Avoid frost or extremely cold conditions. (sarvirestaurant.com)
4. Watering
Chilies prefer moist but not soggy soil. Water deeply when the top layer dries out. Mulching helps retain moisture and maintain even soil temperature. Avoid overwatering to prevent root rot. (sarvirestaurant.com)
5. Fertilization
Feed your plants every 3–4 weeks with balanced organic fertilizer or compost tea. Nitrogen supports leaf growth, while phosphorus and potassium boost flowers and fruiting. (gardenerguidebook.com)
6. Pruning and Support
Remove yellow or weak leaves to encourage airflow and stronger fruiting. Taller varieties benefit from stakes or small supports to keep branches upright under the weight of chilies. (chili-shop24.com)

Tips for Maximizing Yield
Nutrition
Ensure consistent fertilization to produce more flowers and fruit. Organic compost or liquid fertilizers with high potassium content improve chili yield. (myorganicgarden.in)
Sunlight
Adequate sunlight encourages flowering and larger fruit. If growing indoors, use grow lights to supplement natural light.
Pollination
Outdoor plants are pollinated by insects and wind. For indoor plants, gently shake flowers or use a small brush to transfer pollen. (chili-shop24.com)
Pest Management
Watch for aphids, whiteflies, and caterpillars. Neem oil or mild soapy sprays are effective, safe, and organic options. (myorganicgarden.in)

Common Mistakes Beginners Should Avoid
- Overcrowding Plants: Limits airflow and reduces fruit size.
- Overwatering: Saturated soil can kill roots.
- Insufficient Sunlight: Leads to weak plants and poor fruiting.
- Neglecting Fertilization: Without nutrients, fruit yield drops.
- Ignoring Pests Early: Infestations spread quickly and reduce harvest. (bhg.com)
Harvesting Your Chilies
Chilies typically mature 60–90 days after planting, depending on the variety. You can harvest them green or wait until they turn red, orange, or yellow. Regular harvesting encourages continuous fruiting throughout the season. (myorganicgarden.in)
Homegrown chilies taste better because they ripen naturally on the plant and are free from chemicals or pesticides. Regular harvesting ensures that the plant focuses energy on producing new fruits. (trucoshogarjardin.com)
Suggested Authoritative Sources
- Better Homes & Gardens – Tips on spacing, pruning, and maximizing chili yield (bhg.com)
- Gardener Guidebook – Beginner-friendly chili growing guide (gardenerguidebook.com)
- Chili-Shop24.com – Expert advice on chili plant care and container growing (chili-shop24.com)
- Trucos Hogar Jardín – Tips for year-round chili cultivation (trucoshogarjardin.com)
These sources provide practical, research-backed guidance for healthy, productive chili plants.
Conclusion
Growing chili at home is fun, rewarding, and highly productive. With minimal space and simple care routines, you can enjoy beautiful, high-yield chili plants throughout the season. Regular sunlight, proper soil, watering, and fertilization result in continuous harvests of flavorful, fresh chilies.

Even beginners can start small, follow these steps, and enjoy the satisfaction of homegrown, spicy, and decorative chilies. Start your chili garden today and experience [FOCUS KEYWORD] — combining beauty, productivity, and delicious flavor in your home garden