Hibiscus plants are cherished for their vibrant, large flowers that can add a tropical touch to any garden or indoor space. While many may assume that growing hibiscus requires advanced gardening skills or extensive knowledge, the truth is that you can successfully propagate them from stem cuttings using simple techniques. In this article, we’ll explore the step-by-step process of growing hibiscus plants from cuttings, focusing on simple techniques that yield fast results.
Understanding Hibiscus Plants
Hibiscus belongs to the Malvaceae family and includes several species, the most popular being Hibiscus rosa-sinensis, commonly known as Chinese hibiscus. These plants can be perennial or tropical, depending on the variety. They are known for their stunning trumpet-shaped flowers, which bloom in a spectrum of colors including red, pink, yellow, and white.
Growing hibiscus plants from cuttings is an economical method to expand your collection or share with friends and family. By understanding the basics of propagation, along with the right techniques, you can nurture these beautiful plants with ease.
Why Propagate from Cuttings?
- Cost-Effective: Purchasing hibiscus plants can be expensive, and propagating from cuttings saves money.
- Cloning: Cuttings produce a genetically identical plant, allowing you to retain desired characteristics.
- Simplicity: Stem cuttings are an accessible propagation method, suitable for beginners and experienced gardeners alike.
- Quick Results: When done correctly, stem cuttings can root and begin to grow rapidly.
Timing for Taking Cuttings
The best time to take hibiscus cuttings is during the spring and summer months when the plant is actively growing. This timeframe allows the cuttings to root more effectively due to the warmer temperatures and increased light availability.

Step-by-Step Guide to Taking Cuttings
1. Gather Your Materials
Before you begin, make sure you have the following materials on hand:
- Sharp, sterilized garden scissors or shears
- Rooting hormone (optional but recommended)
- Clean pots or seed trays with drainage holes
- Potting mix or a well-draining soil blend
- A plastic bag or a humidity dome
- Water
2. Selecting the Right Stem
Choose a healthy, non-flowering stem from the parent plant. Look for stems that are at least 4-6 inches long and have several leaves. Avoid stems that show signs of disease, pests, or damage. Selecting healthy cuttings increases the chances of successful rooting.
3. Taking the Cuttings

- Using your sharp scissors, cut a section of the chosen stem at a 45-degree angle just below a leaf node (the bump on the stem where leaves emerge).
- Remove the lower leaves, leaving at least two to three leaves at the top. This reduces moisture loss and focuses energy on rooting.
4. Applying Rooting Hormone
While this step is optional, applying rooting hormone can significantly enhance root development. Dip the cut end of the stem into the rooting hormone, shaking off any excess. The hormone promotes quicker rooting and can help prevent rot.
5. Planting the Cuttings
- Fill your pots or seed trays with the potting mix, ensuring it is moist but not soggy.
- Make a small hole in the soil using your finger or a stick and gently insert the cut end of the stem.
- Firmly but gently pack the soil around the cutting to provide stability.
6. Watering
After planting, water the cuttings lightly to settle the soil. Ensure the soil is kept slightly moist, as overwatering can lead to rot.
7. Creating a Humid Environment
Hibiscus cuttings thrive in a humid environment. To achieve this, cover the pots with a plastic bag or place them under a humidity dome. This step helps retain moisture around the cuttings, which is crucial for rooting.

- Ensure the bag or dome is not touching the leaves to prevent mold growth.
- Ventilate the container occasionally to prevent excess moisture buildup and to allow fresh air in.
8. Providing Proper Light
Place the cuttings in a warm location with indirect sunlight. Direct sunlight can scorch the delicate cuttings, while insufficient light may hinder growth. A bright, filtered light is ideal.
9. Monitoring and Care
Over the next few weeks, monitor the moisture levels and check for signs of growth. Keep the soil consistently moist but not drenched. After about 4-6 weeks, you should notice new growth, which indicates that the cuttings have rooted successfully.
10. Transplanting
Once the cuttings have established a healthy root system, which can typically be confirmed by gentle tugging (resistance indicates roots), you can transplant them into larger pots or directly into your garden. Be sure to acclimate them slowly to outside conditions if they were started indoors.
Common Challenges and Solutions
-
Poor Rooting: Ensure you’re using fresh stems and take cuttings during the appropriate season. Applying rooting hormone can help reduce this issue.

-
Wilting Leaves: Wilting can result from underwatering or excessive heat. Keep soil moist but not soggy, and ensure the cuttings have adequate humidity.
-
Mold Growth: Excess humidity can lead to mold. Ventilate the environment and remove any affected cuttings to prevent spreading.
-
Stunted Growth: Insufficient light is often the cause. Move the cuttings to a brighter location while avoiding direct sunlight.
FAQs
Q1: How long does it take for hibiscus cuttings to root?
Typically, hibiscus cuttings will take about 4-6 weeks to root, depending on the conditions and care provided.
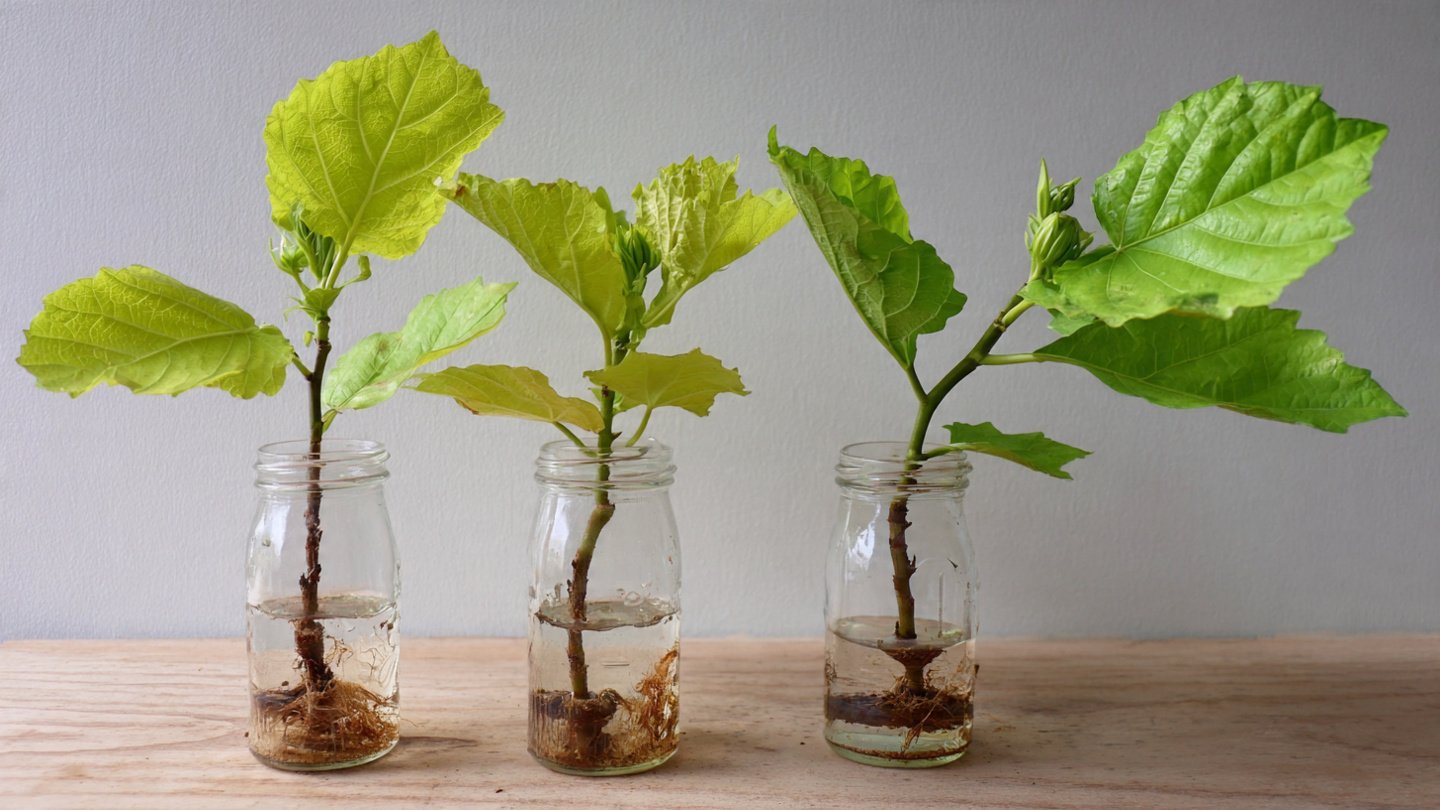
Q2: Can I propagate hibiscus in water?
Yes, hibiscus cuttings can be propagated in water. However, this method may take longer for roots to form compared to using soil.
Q3: Is rooting hormone necessary for hibiscus cuttings?
While not strictly necessary, rooting hormone can significantly enhance the chances of successful rooting by promoting faster root growth.

Q4: What type of soil should I use for hibiscus cuttings?
A well-draining potting mix is ideal for hibiscus cuttings. You can also add perlite or sand to improve drainage.
Q5: Can I propagate flowering hibiscus?
It’s best to take cuttings from non-flowering stems, as flowering can divert energy away from root development. Choose stems with healthy leaves instead.
Q6: How can I tell if my cuttings have successfully rooted?
New growth and resistance when you gently tug on the cutting are good indicators that roots have formed successfully.
Q7: What should I do if my cuttings don’t root?
If your cuttings do not root after a few weeks, check for environmental issues such as humidity and light exposure. You can also try taking new cuttings and ensuring that they’re fresh and healthy.
Conclusion
Growing hibiscus plants from stem cuttings is a straightforward and rewarding endeavor. By following the techniques outlined in this article, you can enjoy the beauty of these stunning flowers in your own garden or share them with family and friends. With patience and care, your hibiscus cuttings will flourish into beautiful plants that brighten any space. Happy gardening!