Curry leaf plants (Murraya koenigii) are beloved for their aromatic leaves, commonly used in Indian cuisine. Not only do these plants enhance the flavor of dishes, but they also offer a wealth of health benefits. If you’re looking to cultivate your own curry leaf plant, starting from stem cuttings is an excellent and straightforward method. This guide will walk you through the process step by step, ensuring you have all the information necessary for a successful endeavor.
Understanding the Curry Leaf Plant
Description and Benefits
Curry leaf plants are small, evergreen trees that belong to the Rutaceae family. Known for their glossy, green leaves, they thrive in warm, tropical climates but can also adapt to indoor environments. The leaves are rich in vitamins A, B, C, and calcium, making them a healthy addition to your diet.
Ideal Growing Conditions
Before you begin, ensure you understand the best conditions for growing curry leaf plants:
- Climate: They flourish in warm temperatures (65°F to 85°F or 18°C to 29°C).
- Light: Full sunlight is ideal. Aim for at least 6 hours of direct sunlight daily.
- Soil: Well-draining soil rich in organic matter is best. A mix of potting soil, sand, and compost works well.
Preparing for Planting
Gather Your Materials

Before you take your stem cuttings, make sure you have the following tools and materials ready:
- Sharp, clean scissors or pruning shears
- Small pots with drainage holes
- Well-draining potting mix or seed starting mix
- Rooting hormone (optional but recommended)
- Plastic bag or a mini greenhouse to maintain humidity
Selecting the Right Cuttings
When selecting cuttings from a healthy curry leaf plant, opt for stems that are approximately 4-6 inches long with at least two to three leaves. Ensure the stems are green and not woody, as woody stems are less likely to root successfully.
Taking Stem Cuttings
-
Choose the Right Time: Early spring or late summer is the best time to take cuttings. The weather should be warm and humid, allowing for quicker rooting.
-
Cutting the Stems: Use your scissors to make a clean cut just below a leaf node—this is where the new roots will sprout from. Remove the lower leaves, leaving just a few at the top.

-
Optional Step – Apply Rooting Hormone: Although not necessary, applying rooting hormone to the cut end can promote faster rooting. Dip the cut end in water, then into the rooting hormone powder, shaking off any excess.
Planting Your Cuttings
-
Prepare the Pots: Fill small pots with your well-draining potting mix. Make sure to leave some space at the top.
-
Insert the Cuttings: Make a small hole in the center of the soil with your finger or a stick. Insert the cutting about 2 inches deep and gently pat the soil around it.
-
Watering: Lightly water the soil until it’s moist but not soggy. Overwatering can lead to root rot, a common issue when propagating plants.
-
Humidity and Warmth: Cover your pots with a plastic bag, mini greenhouse, or even a clear plastic cup to maintain humidity, which is crucial for rooting. Place them in a warm, well-lit area, but avoid direct sunlight, which can overheat and scorch the cuttings.
Caring for Your Cuttings
Watering
Keep the soil consistently moist (but not waterlogged) until the cuttings root. Water them gently every few days, checking the moisture level regularly.

Light
Place your pots in a spot where they receive bright, indirect light. Too much direct sunlight can scorch the young leaves, while inadequate light may hinder growth.
Temperature
Ensure that the temperature is consistently warm. If nighttime temperatures drop significantly, consider bringing the pots indoors or providing additional warmth.
Monitoring Growth
After a few weeks, you should see new growth, indicating that roots have established. Once you notice this, you can remove the plastic covering.
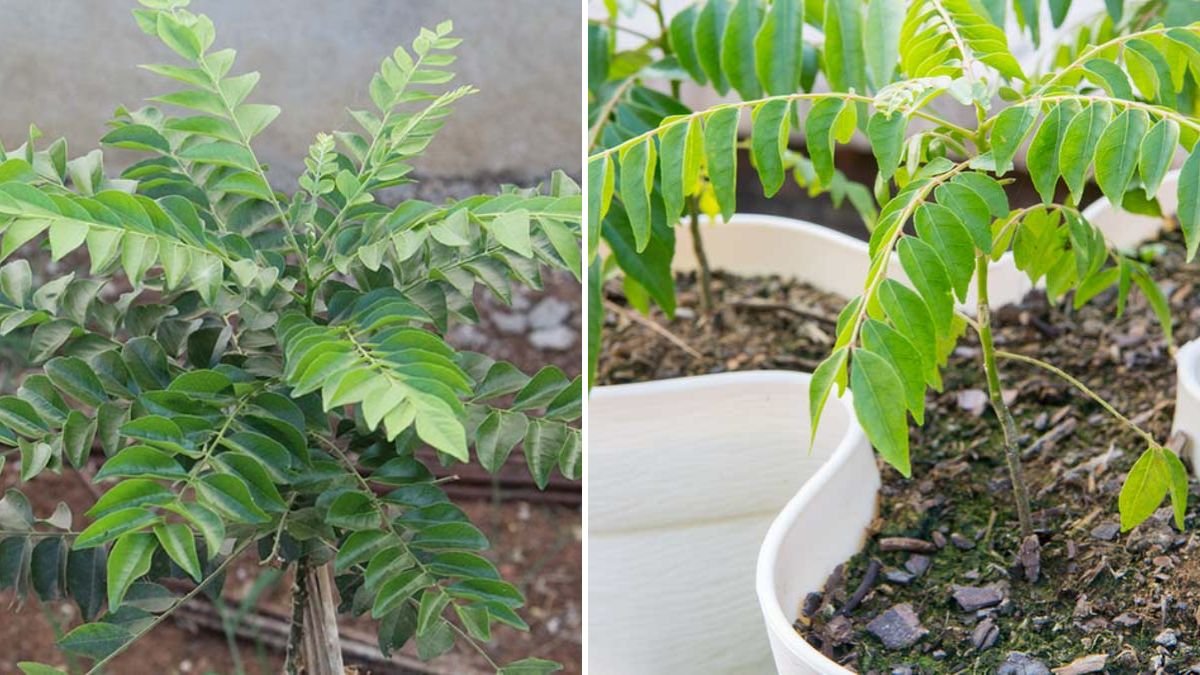
Transplanting Your Seedlings
When your cuttings have developed roots and grown to about 6-8 inches tall (typically within 4-8 weeks), they are ready to be transplanted into larger pots or directly into your garden.
-
Select Larger Pots or Outdoor Spaces: If planting outdoors, ensure that the area has well-draining soil and receives full sunlight.
-
Transplant Cautiously: Gently remove the young plant from its pot, being careful not to damage the roots. Place it into its new home, fill with soil, and water thoroughly.
-
Ongoing Care: Continue to water regularly, fertilize every few months with a balanced fertilizer, and watch for pests.

Common Challenges and Solutions
Yellow Leaves
If the leaves of your curry leaf plant turn yellow, it may indicate overwatering or poor drainage. Check the soil moisture and adjust your watering schedule accordingly.
Pest Infestation
Common pests include aphids and spider mites. Regularly inspect your plants for signs of infestation and treat them with insecticidal soap or neem oil if needed.
Lack of Growth
If your curry leaf plant seems stagnant, ensure it’s receiving adequate light and nutrients. A balanced fertilizer can help stimulate growth.
FAQs About Growing Curry Leaf Plants from Stem Cuttings
Q: How long does it take for curry leaf cuttings to root?
A: Typically, curry leaf cuttings will root within 4-8 weeks under optimal conditions.

Q: Can I grow curry leaf plants indoors?
A: Yes, curry leaf plants can thrive indoors if they receive enough sunlight. Place them in a south or west-facing window for the best results.
Q: What type of soil is best for curry leaf plants?
A: A well-draining soil rich in organic material is best. Consider a mix of potting soil, sand, and compost.
Q: How often should I water my curry leaf plant?
A: Water your curry leaf plant when the top inch of soil feels dry. Be cautious not to overwater, as this can lead to root rot.
Q: When should I fertilize my curry leaf plant?
A: Fertilize your curry leaf plant every 4-6 weeks during the growing season (spring and summer) using a balanced plant fertilizer.
Q: Can I propagate curry leaf plants in water?
A: While it is possible, rooting in soil is generally more successful for curry leaf plants, as they prefer less moisture around their roots.
Q: Is the curry leaf plant hardy outside?
A: If you live in a region where temperatures do not drop below 50°F (10°C), the curry leaf plant can be grown outdoors year-round. In colder climates, it’s best to bring the plant indoors during winter.
Conclusion
Growing curry leaf plants from stem cuttings is a rewarding and enjoyable process. With the right conditions, care, and a little patience, you can cultivate your own fragrant curry leaves at home. Whether you’re enhancing your culinary creations or enjoying the beauty of the plant, your efforts will surely be worth it. Embrace the journey, and enjoy the aromatic rewards!