Zinnias are vibrant and cheerful flowers that can bring life to any indoor space. With their bold colors and attractive blooms, they are a favorite among gardeners and flower enthusiasts. Growing zinnias indoors is not only a rewarding experience, but it also provides a beautiful way to enhance your home decor. This article will guide you through the easy steps to successfully grow indoor zinnias in any environment, helping you cultivate a stunning display of these delightful flowers.
Understanding Zinnias
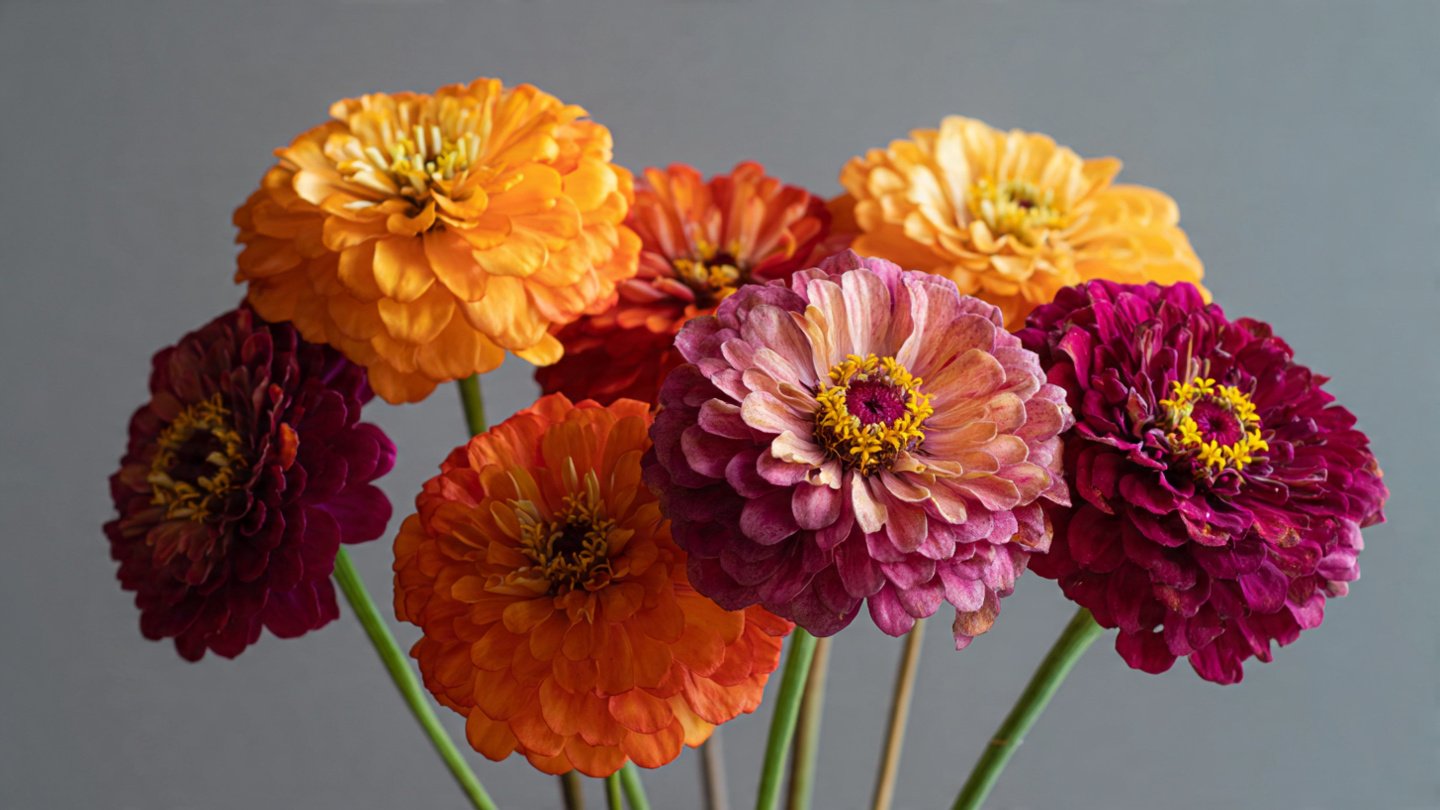
Before diving into the growing process, it’s essential to understand what zinnias are. Native to Mexico, zinnias belong to the Asteraceae family and come in various species and hybrids. They thrive in warm climates and are known for their resilience and ability to bloom continuously throughout the growing season. With a range of colors, sizes, and blooms—ranging from single to double petals—there’s a zinnia variety for every taste.
Choosing the Right Variety
When growing zinnias indoors, selecting the right variety is crucial. Some popular choices include:
- Zinnia elegans: Known for their large, colorful blossoms and bushy growth habit.
- Zinnia angustifolia: Smaller and more compact, perfect for limited spaces.
- Zinnia linearis: Features thin, narrow petals and is extremely drought-resistant.
Choose a variety that suits your indoor gardening space and complements your home’s aesthetics.
Step 1: Gather Your Supplies
Before planting, gather the necessary supplies:
- Containers: Choose pots with drainage holes. Zinnias thrive with good drainage to prevent root rot.
- Soil: Use a high-quality potting mix rich in organic matter. A mix designed for flowering plants is ideal.
- Seeds or seedlings: Purchase from a reputable source to ensure healthy plants.
- Fertilizer: Look for a balanced, water-soluble fertilizer to promote growth.
- Watering can or spray bottle: For watering your plants.
- Light source: Either a sunny window or grow lights, if natural light is limited.

Step 2: Planting Your Zinnias
Seedlings vs. Seeds
You can either start with zinnia seedlings or sow seeds directly into the potting mix. Here’s how to do both:
-
Using Seedlings:
- Select a healthy seedling from a local nursery or garden center.
- Fill your pot with potting mix, leaving a few inches at the top.
- Make a small hole in the soil for the seedling, gently place it in, and cover lightly with soil.
- Water thoroughly until the soil is moist but not soggy.
-
Sowing Seeds:
- Fill a container with potting mix, leaving space for watering.
- Sow the seeds about 1/4 inch deep and 1-2 inches apart.
- Lightly cover with soil and water gently, ensuring the soil remains moist.

Optimal Planting Time
Zinnias thrive in warm conditions and should be planted when temperatures consistently remain above 50°F (10°C). If starting seeds indoors, consider sowing them 6-8 weeks before the last frost date.
Step 3: Providing the Right Environment
Light Requirements
Zinnias love sunlight. If you’re growing them indoors, place them in a sunny window where they can absorb at least 6-8 hours of direct sunlight daily. If natural light is limited, consider using grow lights positioned 2-3 inches above the plants. Adjust the lights as the plants grow to maintain the appropriate distance.
Temperature and Humidity
Zinnias prefer temperatures ranging between 70°F to 85°F (21°C to 29°C). If your indoor space is cooler, consider using a space heater or placing the pots on a seedling heat mat to maintain warmth.
Zinnias don’t require high humidity, making them suitable for various indoor environments. However, if your home is particularly dry, you might benefit from misting the plants occasionally.
Step 4: Watering and Feeding
Watering Tips
Maintaining the right moisture level is crucial. Here’s how to do it effectively:
- Water the zinnias when the top inch of soil feels dry.
- Ensure water drains freely from the bottom of the pot to prevent root rot.
- Avoid overhead watering, which can promote fungal diseases; instead, water at the soil level.

Fertilization
Feed your zinnias every 4 to 6 weeks with a balanced, water-soluble fertilizer. Follow the package instructions, as over-fertilizing can harm your plants. If you prefer organic options, consider using compost or fish emulsion fertilizers as a nutrient source.
Step 5: Pruning and Maintenance
Regular maintenance helps ensure that your zinnias remain healthy and vibrant:
- Deadheading: Remove spent flowers to encourage new blooms. Pinch or cut the flower just above the first set of leaves.
- Checking for Pests: Be vigilant for common pests like aphids and spider mites. If infested, treat with insecticidal soap or neem oil.
- Cleaning Leaves: Gently wipe leaves with a damp cloth to remove dust and enhance photosynthesis.
Step 6: Harvesting and Enjoying
One of the joys of growing indoor zinnias is being able to enjoy the blooms. You can cut flowers for arrangements once they start blooming:
- Timing: Harvest zinnias in the morning when they are full of moisture for the best vase life.
- Method: Use sharp scissors to cut stems at an angle, ideally taking a few leaves with it to prolong freshness.
Placing the cut flowers in water directly after harvesting helps maintain their hydration.

Troubleshooting Common Issues
When growing zinnias indoors, you might encounter some challenges. Here’s how to address common issues:
- Leggy Growth: If the plants become tall and spindly, they may not be receiving enough light. Adjust their location or use grow lights.
- Pest Problems: Regular inspection can help catch pest issues early. Use organic insecticides or neem oil for treatment.
- Root Rot: Ensure your pots have adequate drainage and avoid overwatering. Signs include yellowing leaves and wilting plants.
Conclusion
Growing zinnias indoors can be an incredibly fulfilling experience, adding a splash of color and beauty to your home. By following these easy steps—from selecting the right variety to ensuring they receive proper care—you can cultivate a flourishing indoor garden of zinnias.
With patience and a little dedication, you’ll be rewarded with stunning blooms that can brighten any space.
FAQs
1. Can I grow zinnias indoors year-round?
Yes! With the right care, zinnias can be grown indoors throughout the year, provided they receive sufficient light and warmth.
2. How often should I water my zinnias?
Water your zinnias when the top inch of the soil feels dry, approximately once a week, adjusting based on environmental factors like humidity and temperature.

3. Do zinnias require a lot of light?
Yes, zinnias thrive with 6-8 hours of direct sunlight daily. If you don’t have natural light, use grow lights as an alternative.
4. What pests should I watch out for?
Common pests include aphids, spider mites, and whiteflies. Regular monitoring and treatment with insecticidal soap or neem oil can help manage infestations.
5. Can I transplant my zinnias outdoors later?
Yes, once the weather warms up, and there’s no risk of frost, you can transplant your zinnias outdoors, ensuring they have acclimated to the new environment.
6. What should I do if my zinnias aren’t blooming?
If your zinnias aren’t blooming, check for adequate light, proper watering, and feeding habits. Sometimes, simply deadheading can encourage more blooms.
7. Are zinnias safe for pets?
Zinnias are considered non-toxic to both dogs and cats, making them a safe choice for homes with pets.
Following these guidelines, you’ll set yourself up for success in growing stunning zinnias indoors! Happy gardening!