Tulsi, also known as Holy Basil (Ocimum sanctum), is a revered plant in many cultures, particularly in India. It is not just a culinary herb but also valued for its medicinal properties and spiritual significance. Growing Tulsi at home is straightforward and rewarding, especially when you master the techniques for multiplying this versatile plant using cuttings and soil. In this article, we will guide you through the techniques, requirements, and care tips to successfully propagate Tulsi plants at home.
Understanding Tulsi: The Herb of Life
Cultural Significance
In Hinduism, Tulsi is often worshipped and considered a sacred plant. Its leaves are used in rituals, and it is believed to bring peace and prosperity to homes. Beyond its spiritual quality, Tulsi has numerous health benefits, including anti-inflammatory and antioxidant properties.
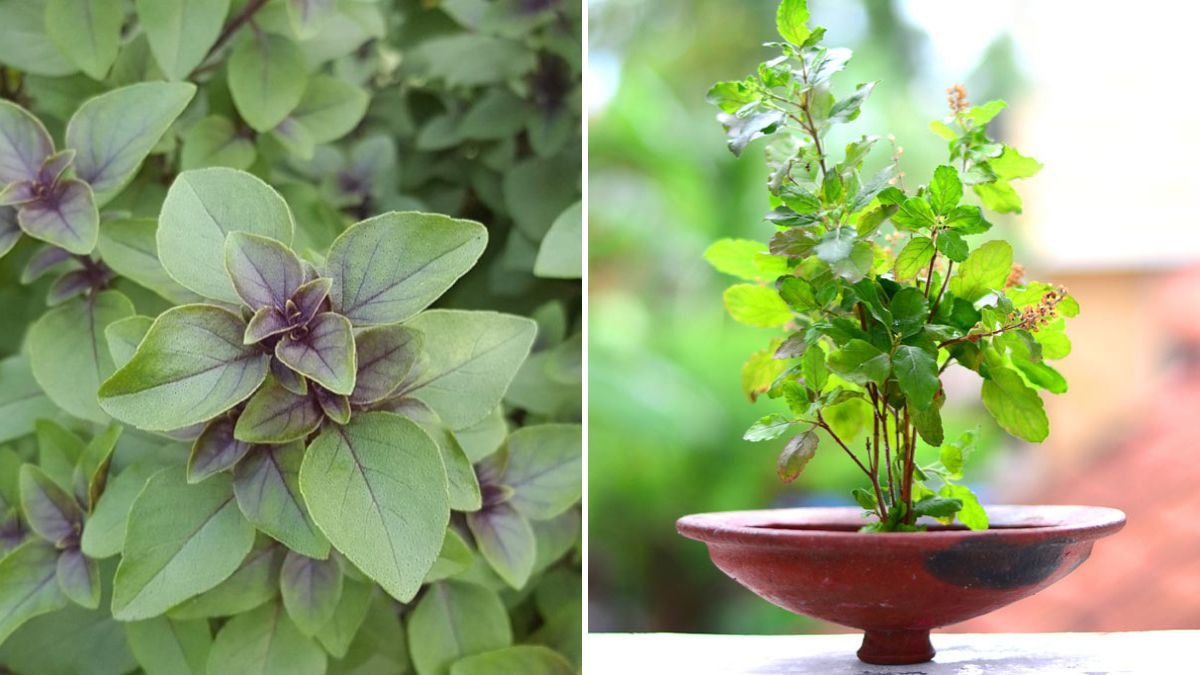
Varieties of Tulsi
There are several varieties of Tulsi, including:
- Vana Tulsi (Wild Basil): Known for its robust flavor, often used in herbal teas.
- Krishna Tulsi: Recognizable by its dark purple leaves and is often used in religious ceremonies.
- Rama Tulsi: Characterized by its green leaves and is commonly used in food preparation.
Understanding the variety you wish to grow will help you provide the right care and conditions for optimal growth.
The Basics of Propagation
What is Propagation?
Propagation is the process of creating new plants from an existing plant. For Tulsi, the most effective and simple method is through cuttings. This technique ensures that the new plants maintain the same genetic traits as the parent, allowing for consistent quality in taste and health benefits.
Choosing the Right Time

The best time to take cuttings from a Tulsi plant is during the growing season—typically spring or early summer. This is when the plant is most vigorous, making it easier for the cuttings to root successfully.
Step-by-Step Guide to Propagating Tulsi Using Cuttings
Step 1: Gather Your Materials
Before you start, ensure you have the following items:
- Healthy Tulsi plant
- Sharp, clean scissors or pruning shears
- Small pot (preferably with drainage holes)
- Potting soil or a well-draining mix
- Water
- Plastic bag or humidity dome (optional)
Step 2: Taking Cuttings
-
Select Healthy Stems: Choose a healthy stem from your Tulsi plant that is at least 4-6 inches long and has several leaves. Avoid stems that are yellowing or diseased.
-
Make the Cut: Using your sterile scissors, make a clean cut just below a leaf node (the point where a leaf attaches to the stem). Removing the lower leaves and keeping a few intact will help reduce moisture loss.
Step 3: Preparing the Cuttings
-
Remove the Lower Leaves: This should be done carefully so that only a couple of leaves at the top remain. This helps the cutting focus its energy on root development.
-
Optional – Dip in Rooting Hormone: While not always necessary, you can dip the cut end of the cutting in rooting hormone to promote faster root growth.

Step 4: Planting the Cuttings
-
Fill the Pot with Soil: Fill your pot with a well-draining potting mix, leaving about an inch of space at the top.
-
Plant the Cuttings: Make a small hole in the soil for each cutting and gently place it in, ensuring the cut end is in contact with the soil. Firm the soil around the base to provide stability.
Step 5: Watering
- After planting, gently water the soil until it is damp but not soggy. Avoid overwatering as this can cause rot.
Step 6: Creating Optimal Conditions
-
Humidity: To maintain moisture, you can cover the pot with a plastic bag or a humidity dome. Ensure that the cover does not touch the leaves to prevent mold growth.
-
Light: Place the pot in a warm, bright location but avoid direct sunlight to prevent scorching the cuttings.
Step 7: Waiting for Roots to Develop
- It typically takes 1-3 weeks for the cuttings to develop roots, depending on conditions. You can check for roots by gently tugging on the cutting; resistance indicates that roots are forming.

Step 8: Transplanting
Once the cuttings have developed a healthy root system, you can transplant them into larger pots or into your garden.
-
Select a New Pot: Choose a larger pot with good drainage if transplanting.
-
Prepare the Soil: Use a mix of potting soil and compost for nutritional benefits.
-
Transplant: Gently remove the cuttings from the initial pot and place them in the new pot, filling in around the roots with soil.
Step 9: Care for Your New Tulsi Plants
After planting, it’s essential to provide proper care for healthy growth.
- Watering: Keep the soil consistently moist but avoid waterlogging.
- Light: Move the pots to a location where they can receive at least 6 hours of sunlight daily.
- Fertilization: After a month, feed your plants with a balanced organic fertilizer.
Troubleshooting Common Issues
While propagating Tulsi is relatively easy, you may encounter some problems. Here are common issues and how to resolve them:

Issue: Stunted Growth
- Solution: Ensure they get adequate sunlight and are not overcrowded in pots.
Issue: Leaves Yellowing
- Solution: Check for overwatering; adjust watering practices accordingly.
Issue: Mold on Soil Surface
- Solution: Allow the top layer of soil to dry out between waterings and ensure good air circulation.
Harvesting Tulsi
Once your Tulsi plants have matured (approximately 6-8 weeks), you can begin harvesting leaves.
- Choose the Right Time: It’s best to harvest in the morning when the essential oils are most concentrated.
- Harvesting Method: Use scissors to cut the leaves or stems selectively, allowing the plant to continue growing.
Regular harvesting encourages bushier growth and a continuous supply of fresh leaves.
Frequently Asked Questions (FAQs)
1. How long does it take for Tulsi cuttings to root?
It typically takes 1-3 weeks for Tulsi cuttings to develop roots, depending on environmental conditions.

2. Can I propagate Tulsi in water instead of soil?
Yes, you can propagate Tulsi cuttings in water. Place the cut ends in a glass of water, ensuring they are submerged. Change the water every few days and plant the cuttings in soil once roots have developed.
3. What type of soil is best for growing Tulsi?
A well-draining potting mix enriched with organic matter is ideal for growing Tulsi. Ensure good drainage to prevent root rot.
4. How often should I water my Tulsi plants?
Water when the top inch of the soil feels dry. Tulsi prefers slightly moist soil but hates being waterlogged.
5. Is Tulsi a sun-loving plant?
Yes, Tulsi requires at least 6 hours of sunlight each day to thrive.
6. Can Tulsi attract pests?
Yes, Tulsi can attract pests like aphids and spider mites. Regularly check your plants and use neem oil or insecticidal soap to manage infestations.
7. How do I keep my Tulsi plant healthy?
Provide sufficient sunlight, water appropriately, and fertilize occasionally. Regular harvesting also encourages healthy growth.
Conclusion
Multiplying Tulsi plants at home using cuttings is a simple and gratifying endeavor that not only enhances your garden but also provides you with a sustainable supply of this incredible herb. The techniques outlined in this guide ensure success in propagating Tulsi plants, enabling you to enjoy their flavor and benefits throughout the year. Whether for culinary use or wellness, knowing how to propagate and care for Tulsi will enrich your gardening experience. Happy planting!