Turnips are a versatile and nutritious root vegetable that can enhance any home garden. With their crisp texture and unique, slightly peppery flavor, they are a favorite in many dishes—ranging from soups and stews to salads and pickles. If you’re looking to grow turnips successfully and maximize both yield and flavor, this comprehensive guide will help you along the way.
Understanding Turnips
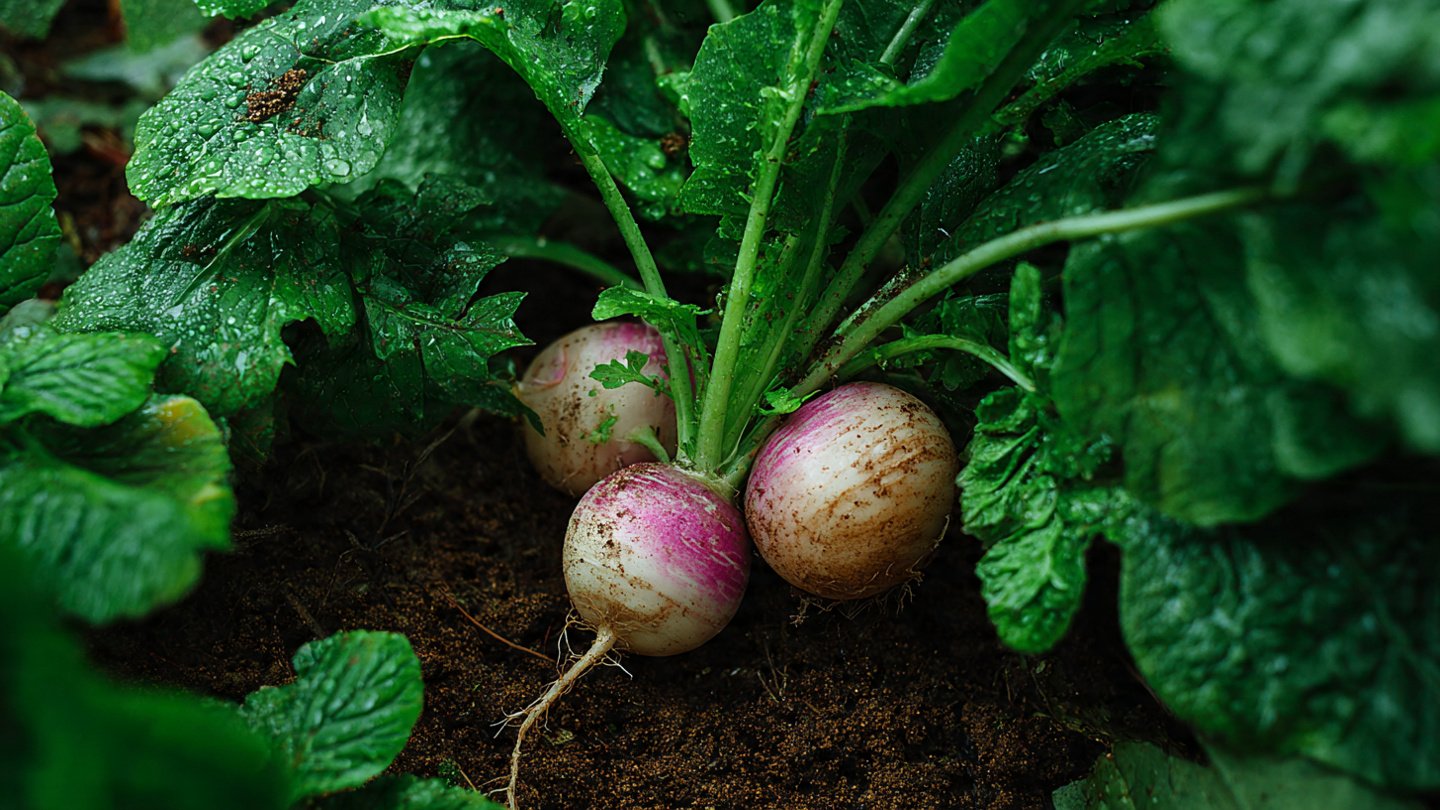
Before we dive into the best methods for growing turnips, it’s essential to understand what makes them a unique vegetable. Turnips (Brassica rapa) belong to the Brassicaceae family, which includes kale, cabbage, and broccoli. They are biennial plants generally grown as annuals for their edible roots and greens.
Varieties of Turnips
Several varieties of turnips can be cultivated, including:
-
Purple Top White Globe: This is the most popular variety, known for its purple top and white flesh. It has a mildly sweet flavor.
-
Golden Ball: Known for its beautiful golden color, this variety has a slightly sweeter taste and is excellent for roasting.
-
Tokyo Bekana: A Japanese variety that is sweeter and less pungent, the greens are also edible and delicious.
-
White Lady: This variety matures quickly and has a smooth, white interior with a milder flavor.
Best Methods for Growing Turnips

1. Planning Your Garden
Site Selection
Turnips thrive in full sun but can tolerate partial shade. Choose a location that receives at least 6-8 hours of sunlight per day. The soil should be well-drained with a pH between 6.0 and 7.5.
Soil Preparation
Turnips prefer loose, fertile soil, so till the ground to a depth of at least 12 inches. You can improve the nutrient content by mixing in organic matter such as compost or well-rotted manure. It’s important to remove stones and debris to allow the roots to grow freely.
2. Planting Turnips
Seed Selection
Choose high-quality seeds from a reliable source. Check the package for information on the specific variety’s maturity timeline.
Sowing Seeds
Turnip seeds can be sown directly into the garden bed or started indoors and transplanted later. Here’s how to do it:
-
Direct Sowing: Sow seeds about ½ inch deep in rows that are spaced 12-18 inches apart. Thin seedlings to 4-6 inches apart once they reach a few inches high to prevent overcrowding.
-
Transplanting: If starting seeds indoors, plant about 4-6 weeks before the last frost date. Transplant them outside when they are 3-4 weeks old, spacing them as you would for direct sowing.

Timing
For a continuous harvest, consider planting turnips in succession every two weeks. In cooler climates, spring and fall are ideal for growing turnips.
3. Watering and Fertilizing
Watering
Turnips need consistent moisture, particularly during their initial growth stages. Water the plants regularly, ensuring the soil stays uniformly moist but not waterlogged. Aim for about 1 inch of water per week. Reduce watering as roots mature to enhance their flavor.
Fertilizing
A balanced, slow-release fertilizer is ideal for turnips. Apply fertilizer at planting time and follow up with another application when the seedlings are a few inches tall. Avoid excessive nitrogen, which can lead to lush tops but poor root development.
4. Pest and Disease Management
Turnips are generally resistant to many pests and diseases, but it’s essential to be vigilant.

Common Pests
- Cabbage Moths: These can damage the leaves. Use row covers to protect the seedlings.
- Root Maggots: They can affect the roots; rotate crops to minimize their presence.
Diseases
- Downy Mildew and Powdery Mildew: Prevent these by ensuring proper air circulation and watering at the base of the plants to keep leaves dry.
5. Harvesting Turnips
Turnips are usually ready for harvest 30-60 days after planting, depending on the variety. To determine harvest time:
- Check Size: Harvest when the roots are 2-4 inches in diameter. The larger they get, the more pungent they can become.
- Tasting: A small taste test can help you gauge maturity.
To harvest, gently loosen the soil around the turnips with a spade fork and pull them up by hand.
6. Storing Turnips for Flavor and Freshness

After harvesting, the way you store turnips can affect their flavor and longevity.
-
Fresh Storage: Leave the greens on for short-term storage; they can help keep the roots hydrated. Store them in the refrigerator in a perforated bag.
-
Long-Term Storage: Remove the greens (if not using them) and place the roots in a cool, dark, and humid location. They can be stored for weeks, even months, under proper conditions.
Tips for Maximizing Yield and Flavor
- Soil Quality: Regularly amend soil with compost to promote nutrient-rich growth.
- Adequate Spacing: Thinning plants as they grow allows for better air circulation and root development.
- Companion Planting: Planting turnips alongside crops like beans or lettuce can induce healthier growth patterns.
- Frost Tolerance: Turnips actually taste better after a frost, as cold weather sweetens their flavor.
Common FAQs
Q1: Can I grow turnips in containers?
Yes, turnips can be grown in containers that are at least 12-18 inches deep. Ensure good drainage and use quality potting soil.
Q2: How can I tell if turnips have gone bad?
Look for soft spots, discoloration, or a very strong odor. Fresh turnips should feel firm and solid.

Q3: Are turnip greens edible?
Yes! Turnip greens are nutritious and can be prepared similarly to kale or spinach. They are best harvested when young and tender.
Q4: What are the best growing conditions for turnips?
Turnips thrive in full sun and fertile, well-drained soil with a pH of 6.0-7.5. They prefer cooler temperatures but can tolerate some heat.
Q5: How do I improve the flavor of my turnips?
Plant turnips in cooler weather, avoid over-fertilizing with nitrogen, and consider harvesting them after a frost for a sweeter taste.
Q6: Can I save turnip seeds for future planting?
Yes, turnips can be allowed to bolt (flower) in their second year, producing seeds that can be collected once dried. However, practice crop rotation to maintain genetic diversity.
Conclusion
Growing turnips at home is not only rewarding but also beneficial for your kitchen. With the right techniques, attention, and care, you can achieve a bountiful harvest yielding flavorful and nutritious roots. Whether you use them in salads, soups, or as a roasted side dish, homegrown turnips will elevate your culinary creations. Happy gardening!